RE-FIT & OTHER ACTIVITIES; 2013- 2015.
Current Activity, September 2013.
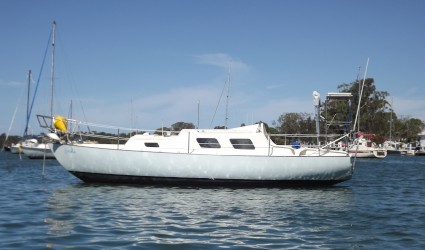
17 September 2013 | Camden Haven home mooring.
Just an update on our activity at present.
Since my last post I have completed the wiring and installation of the new solar panel and the reinsulation of the ice box.
I have now bitten the bullet and I am repainting the interior of Seaka to beat the mould. This has meant sanding off all the old paint in prep for applying two pack paint. I have removed about 10kg of paint dust to date. We are now ready to paint but must first repair some fibreglass and full in some bolt holes. I am also bringing all lines back to the cockpit and in doing so will drop the mast for re-rigging. The only other alteration is to raise the sea berth 10cm to get more storage space for food.
Hoping to have this all done by late November.
Re-rigging and Painting, January 2014.
25 January 2014 | On Home Mooring.
Just an update on the refit.
We now have all fittings out of Seaka with only a couple of days painting to complete all removed gear.
I have the mast out and am at present remaking the mast head and preparing to refit all the deck gear to bring all back to the cockpit.
Major items [after the mast re-rig] to complete are a laid floor in main cabin and the installation of extra navigation lights and AIS. Painting of the main cabin and all varnish work to be done.
Seaka sits 25cm [9"] above her water line at present.
The refit continues.
01 March 2014 | Camden Haven Inlet NSW
Raining! 60mm so far!

Well last weekend the mast went back in with its new rigging and spectra halyards. Work is being finished on the boom and the new deck gear this week.
Next job is to finish the painting, about five days worth with good weather.
With only two inspection ports to install and the reorganising of the electrics, I am hoping to have it all finished by the end of March.
Next job is to finish the painting, about five days worth with good weather.
With only two inspection ports to install and the reorganising of the electrics, I am hoping to have it all finished by the end of March.
Refit Almost completed.
23 November 2014 | On Home Mooring
Very hot. 44 or 110 depending on where you are from!

Above is the new cabin finish.
Just an update.
Most of the refit is complete with only a couple on niggly things requiring input from other people.
I now have a loan of a complete set of charts round to Perth. Will worry about the rest when I get there.
Just starting on the construction of a wind vane similar to {www.windvaneselfsteering.co.uk}
Now looking to anti foul and do final polish 23rd to 26th February 2015.
Constructing Seaka's new Windvane.
28 December 2014

With my plans to go around the block it had become obvious from comments of friends, already half way round, that I was going to need a wind vane steering system.
Over the last few years I have visited many windvane sites and as the cost of the commercial products became clear I started to concentrate on the home built variety. I investigated all the commonly visited web sites and did a fair bit of reading. From time to time I made the decision that this one or the other was going to be the one I would build but I never did really start. Even as late October this year I was talking to Ramona [Seabreeze] about his home made windvane and preparing drawings to build a copy.
Then I picked up the September copy of the English sailing magazine, Practical Boat Owner [www.pbo.co.uk]. The article that caught my eye was about a new design of home built windvane called the Hebridean Windvane. It's actually a HORIZONTAL WIND VANE. I then found the web site of John Fleming [www.windvaneselfsteering.co.uk] the designer, and gleaned what information I could. I decided that there was enough information to reverse engineer the windvane, but most importantly, it would be cheap and quick to build. I decided not to import the components as this would have cost over one thousand dollars plus the assembly costs. It took me about two weeks to prepare the required drawings and material list. While I thought I had the design down pat, I was to discover as I built the windvane that some information was not as evident as I thought and it took careful reading and viewing of photographs and videos to extract the information.
See Album for: Hebridean Wind Vane; First examples.
Looking at my stock of timber I discovered some Blue Gum that I had had for some 20 years, so it was well seasoned. With some Tasmanian Oak I had, as well as buying a 2 m length of Pacific Teak flooring for the pendulum vane, there would be enough timber to build the windvane. .
My first action was to get all the timber dressed at the Laurieton Men's Shed so I could begin construction. The first part built was the main frame, which I made of three parts to be laminated and screwed together. The pendulum blade was reduced using an electric planner. I have changed the original design of the wings to make them easier to construct. I have spent about 16 hours doing the woodwork so far.
See Album for: Port side of the frame; Centre part of the frame; Starboard side of the frame; Cutting the mortise for the vane part; Frame assembled; Port side of the frame assembled; Starboard side of the frame assembled; WV almost complete.
Next I made up the stainless steel parts to my designs as the original seemed to be fussy in some cases. I welded the main pivot block [originally bolted together] but didn't quite get this part right so I had several goes at drilling the right size holes giving me four alternatives. I didn't realize the cost of some drills [the one I needed, but didn't buy, cost $50!] and if building a seconded windvane would use slightly smaller SS pivot rod, luckily the Laurieton Men's Shed had the laths to reduce the pivot rod. I have spent about 4 hours on the steel work.
See Album for: Reducing the SS pivot rod.
At present I am constructing the upper vane part, but this will require the expertise of the Laurieton Men's Shed laths again to complete [around the 12th Jan 2015].
See Album for: Vane part requiring lath work.
In the mean time I will be gluing and preparing the wood parts for painting, completing the final bits of SS fittings and assembling the finish components of the windvane. Mounting the windvane on Seaka is still in development but it will be mounted using SS tube and Bimini fittings. I am trying to lighten the weight of the fitting as the Pacific Teak is fairly heavy.
See Album for: General layout 1; General layout 2; Side position of WV in use; Stern position of WV in use.
So far I have spent around $150 on timber, stainless steel bits and pieces including fixings, $120 on paint and glue and $100 on rigging parts. Final costs should be under $500 plus my labour.
Getting things done. Quick update. January 2015.
07 January 2015
Have had success with the AIS and we are now getting plots on the chartplotter.
Spoke to Raymarine this morning and as a result may have solved the issues with the DSC radio and GPS locations.
May also have an answer to the sail track problem, will see tomorrow.
Spoke to Raymarine this morning and as a result may have solved the issues with the DSC radio and GPS locations.
May also have an answer to the sail track problem, will see tomorrow.
Refit Progress, January.
16 January 2015
Fine & hot
Last week I finally got the AIS to talk to the Garmin Chart plotter and the Chart plotter to talk to the Raymarine DSC VHF radio.
Went up the mast yesterday to try and sort out the anchor light problem. Found that it was working but only with the navigation light on???? So came down with nothing achieved, will have to spend a night onboard [so I can see what light is on] to see exactly what is going on.
I have finished the interior of Seaka!!!!!!
The boom bag and associated sail track have yet to be resolved.
Work on completing the wind vane is progressing. Have only to construct the actual wind vane [on top] working parts, assemble and paint. The attachment to Seaka's stern is underway and evolving. Thought I had lost the use of the stern ladder but will be able to re-install it for those times that I get in the water.
This weekend I will do a bit of gluing to the dinghy and will install the 2 tie down points next week.
Now scheduled to go up on the slip in Laurieton on 23rd February for 3 days. Four coats of anti-fouling going on and a polish to the topsides.
When I come off the slip will begin to load food stores, top off water and fuel etc.
There will be a couple of test sails off Laurieton to check all working parts.
Refit Progress February.
06 February 2015 | Camden Haven Inlet.
Fine.
Well I have reached a major milestone today with the successful installation of 56 cm of new sail track [my design] on the mast. This will allow me to put in a reef correctly. We actually went sailing today on the mooring when we had the mainsail up!
My sail maker will now fix the boom bag and make a new bag for the inflatable dinghy which I have decided to carry roped to the starboard rail just forward of the mast.
Tomorrow night or Sunday I will spend the night on board to sort out the wiring to the mast head lights. They work, just not with the right switches!
I will be having a final flush, during that time onboard, to remove the last of the unnecessary gear.
The horizontal wind vane I'm building is now at the painting stage with only one support bracket to be fitted to Seaka and a small weld when I do the final assembly. Its looking really good.
On the 23rd I go up on the Laurieton slip for 3 days for anti-foul [4 coats this time] and a polish.
Sailing date is still around the middle of March.
Refit Progress.
23 February 2015 | Camden Haven Inlet.
Wet!

Unfortunately the yacht on our local slip at present has some issues [wet etc] and other bookings for survey's, which means I would not get up until the 9th March or there about's.
So I have decided that we will slip at Yamba, which has a travel lift, as the costs are much the same and the pressure to get away will be gone.
Just have to sort out the windvane connection to the tiller and we are ready to go.
Getting close now, first weather window after the 14th March is the planned departure date.
Progress Update.
06 March 2015 | Camden Haven Inlet
Fine
Cleaned the hull off on Thursday. Started to load on books etc.
Found a place for all the anti-foul gear.
We will be hauling out at Horizon Shores at Jacobs Well, last week in March or first week in April.
Have almost finished tiller fitting for the windvane, which is finished.
Hoping to get out Monday or Tuesday for a test sail, then its the big food purchase on Wednesday.
Rapidly finishing of all the home jobs.
Nearly Ready.
09 March 2015 | Camden Haven Inlet.
Fine with NE winds

Today I washed Seaka’s deck down, amazing how dirty it can get. Finished off the tiller cleats for the wind vane [WV], but had to dash up to Port Macquarie to get a length of 4mm SS threaded rod as nobody local had 4mm bolts 75mm long to complete it. Dropped the WV in position and found I’ll have to grind a bit off to allow the WV to be raised clear of the water. I will have to organise that tomorrow or Wednesday. We had the sail-maker onboard at lunchtime to move a couple of lugs on the boom bag.
I have finally got all the rubbish and non-going stuff off Seaka. Only have to do a final reshuffle of the lockers and we are good to go. Today I refuelled the diesel [40 lts or 45 hours steaming, onboard] and put 40 lts of water in, about 40 more required.
Weather: It looks like we will sail around 5 pm [1700 hours] next Sunday [15th March]. This will give us a couple of hours of a gentle NE’er to bash into before it turns into an easterly and then around to the south. We will have to watch the forecasts and see how it pans out. It will mean an overnight-er to Coffs Harbour, arriving mid-afternoon. Then an early morning sail on Tuesday to Iluka with an ETA of around 1600 hours to catch the top of the tide.
Looking forward getting started, Rob in Sundowner, a Mark 3 Top Hat, has reached Albany, only has to get to Melbourne to complete his circumnavigation of Australia.
Shakedown sail off the Camden Haven Inlet.
10 March 2015
Fine 10 Knot Southerly.

Today has been a disaster, triumph, a drama, a steep learning curve and I got bloody sun burnt!
This morning the Camden Haven was blanketed by fog and it looked like there would be no wind, hence no test sail for today. But by 10 am the fog was gone and a southerly wind of less than 10 knots was blowing. So hanked on the Yankee and set off for the 25 minute trip to the bar. Well that was a non-event as the bar was dead flat. I motored out clear of the bar and raised the Yankee then the mainsail. The mainsail was a bit of a drama as I had neglected several things, like releasing the downhaul, the getting part of the boom bag sucked into a reefing block, not releasing the main sheet so I could get the mainsail all the way up. To add to that the reefing sheets were pulled in too far, so had to release them as well. Then I had all these extra sheets hanging around on the cockpit floor with no apparent home, what a mess.
T'was easy to see I hadn't raised a sail for some time.
Oh well. The dramas continued as we motor sailed to the east when I realised I'd blown the fuse on the auto helm. Disconnecting the autohelm and turning the engine off I discovered we were sailing in a straight line!!!!!
Yippeee the wind vane, it works!!
Now that was on a broad reach so I adjusted the vane head and low and behold we turned through 45 degrees to the north. With a little bit more fiddling I had us [that's the royal 'us', in other words Seaka and I] sailing downwind without any yawing at all and I didn't even touch the tiller!
That's a $600 successful wind vane. The fact that I had to spend another $100 on cleats and blocks, won't be counted.
Ok, so with that success I headed back in with more drama of course as I was still remembering the sequences of sailing, like drop that sail, bugger forgot to do that first, and so on it went, not helped of course by the autohelm being out of action. Yep, I know, excuses excuses, but I'll remember next time!
With the tide flooding it was a quick trip back to my mooring. After all that it was a real mess in the cockpit. Lunch first, funny thing was I could smell diesel but onto cleaning up on deck first and stowing away sails and sheets.
Now, to check out that diesel smell. First the bilge, yep that's diesel down there but where the hell is it coming from? First I checked the fuel filter as I had just replaced two washers there to stop a persistent leak I had had for some time, but it was dry. So around the engine I went feeling under all the fuel pipes until bingo, I found it. The pipe from the fuel pump to the fuel filter has given up the ghost. A quick call to Nanni in Sydney meant I wasn't going to give them any more money at this stage, but that I should get it fixed locally. So a call to a local Hydraulics outfit means I will be getting up real early tomorrow to get down to Seaka remove BOTH fuel lines and dashing up to Port Macquarie to get them replaced.
So I did a bit of a clean-up and started the removal of the windvane [WV] to alter part of the bracket so I can raise the blade clear or the water when motoring or using the autohelm. Well that was it, before I knew it I had made my first sacrifice to King Neptune for this voyage as a block slipped overboard and sunk out of sight.
Now I usually don't give up easily so grabbing a mask and fins, bugger no togs, boxers will have to do and it was into the dingy and into the water. Now I've never got back into this dingy from the water before so this was a bit of a gamble, I did untie the dinghy though in case I had to swim it ashore to get back into it. So up and down I snorkelled looking for this block which the tide had claimed. Well King Neptune won this time but bloody hell I didn't realise how shallow it was only some 20 meters from my mooring!
So that was my day, disastrous, triumphant, dramatic and bloody sun burnt!
See video at www.youtube.com/watch?v=zYzS97Fg5mc
and www.youtube.com/watch?v=H3HVpyG__ZQ
Ongoing Preparations.
11 March 2015 | Camden Haven Inlet.
Fine
I have replaced the old fuel lines today after having a new set made in Port Macquarie. I am glad I did that now as it would have been a real hassle somewhere up the coast.
After getting the Nanni diesel going again I cleaned up the boat. I then started in on the bilge [24 hour job] and will finish that Thursday morning.
Then went and did the first bit of the food shopping and about $400 later I have the basics to go on board tomorrow. Still a bit of food to get on Thursday with the fresh stuff to be brought the day before we leave.
The weather is looking dicey [2 m swell] and as I don't want to get trapped in Coffs at $50 a night our departure date is under constant review.
Bar Bound.
14 March 2015 | Camden Haven Inlet.
Well we should have gone last Tuesday!
The weather , influenced no doubt by the cyclones in the Pacific, has meant forecasts of 20-30 knot winds and 2-3 m seas. All not at the same time of course but just connecting enough to make a passage north very hard. Would also have meant some time at the Coffs Harbour Marina at $50 a night, ouch!
So have decided to wait it out at home with a glimmer of hope around next Saturday, 21st March.
We are all ready to go, except for the fresh food.
Bar Bound by Weather.
16 March 2015
Still not looking any better.
Moved the dinghy, cockpit grate and the charts onboard today.
Sorted out the blocks for the windvane.
Repacked the cockpit lockers.
Only the outboard motor, fresh food and clothing to go onboard now.
Moved the dinghy, cockpit grate and the charts onboard today.
Sorted out the blocks for the windvane.
Repacked the cockpit lockers.
Only the outboard motor, fresh food and clothing to go onboard now.
Getting Started!
17 March 2015 | Camden Haven Inlet.

OK, the decision has been made, we will go north on the Southerly expected early Saturday morning [21st March].
Hope to be over the bar by 0700 and our ETA at Yamba is 1200 the next day.
Should be a fast sail for the first 18 hours and then more stately.
In fact we may have to motor the last few miles if the expected NE change
comes in early.
Seaka is ready, only clothes and fresh food to go onboard.
On Friday I will move from my mooring over to the local free wharf at the Laurieton United Services Club.


